Storing Identity Data for an ASP.NET Core Application in a PostgreSQL Database
October 21, 2020
Visual Studio project templates help developers be more productive by providing project shells with various dependencies in place. In this post, our focus is the default Visual Studio 2019 project template for ASP.NET Core. We will modify this project to store user identity information in a PostgreSQL database (the default is a SQL Server LocalDB) running in a container.
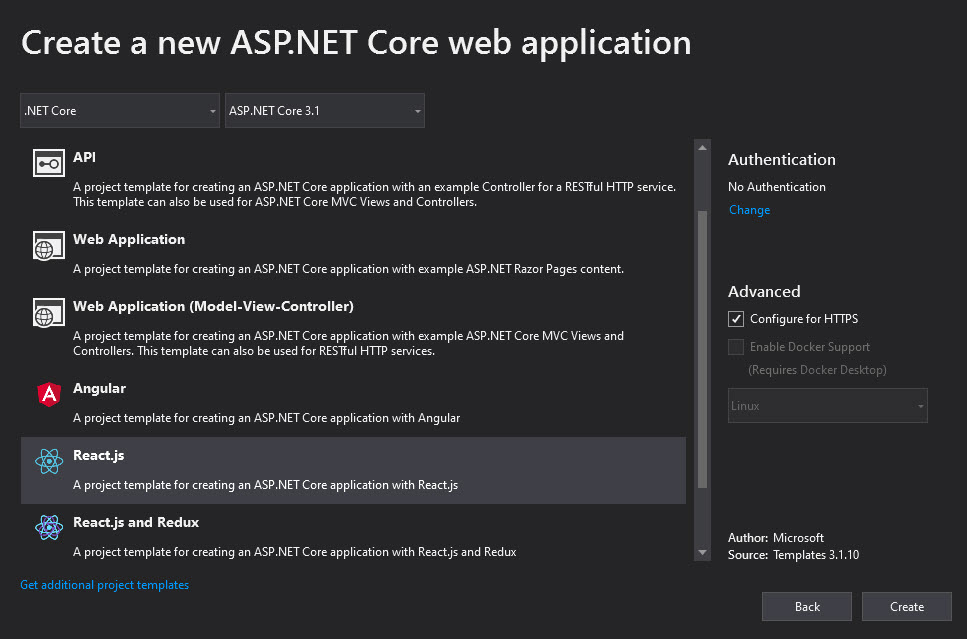
In the following example I am using the project template that uses React at the front end.

ASP.NET Core Identity
ASP.NET Core Identity is the membership system for ASP.NET Core web applications. This library allows users to create accounts, log into the system, or use external identity providers such as Facebook, Google or Microsoft Account etc. In the template that Visual Studio 2019 uses to create the project shell, the default UIs for these functions come from a Razor library provided by Microsoft.

You can also see an Entity Framework Core migration that creates the default database schema to support ASP.NET Identity.

Our objective is to make sure that the default migration works against a PostgreSQL database instead of SQL Server.
Step 1 - Add Ngpsql package
In Package Manager Console in Visual Studio 2019, use the following to install Ngpsql package for .NET Core.
Install-Package Npgsql.EntityFrameworkCore.PostgreSQL -Version 3.1.4
You should also remove the Entity Framework Core package for SQL Server from your project dependencies.
Step 2 - Configure Startup.cs to use PostgreSQL
In your Startup.cs, find the following:
services.AddDbContext<ApplicationDbContext>(options =>
    options.UseSqlServer(
        Configuration.GetConnectionString("DefaultConnection")));
Change it to use Npgsql instead of SQL Server.
services.AddDbContext<ApplicationDbContext>(options =>
    options.UseNpgsql(
        Configuration.GetConnectionString("DefaultConnection")));
At this point make sure that you have a proper connection string in appsettings.json file, which will look something like this:
"ConnectionStrings": {
    "DefaultConnection": "Server=localhost;Port=5432;Database=AspNetIdentitySampleDB;User Id=postgres;Password=xxxx"
}
Step 3 - Set up database using Docker-Compose
Thanks to Docker it’s easy to set up PostgreSQL with Adminer. You can use the following .yml file to set things up nicely. The file is included in the Github repo linked below.
version: '3.1'

services:

  db:
    image: postgres:13.0
    restart: always
    ports:
      - 5432:5432
    environment:
      POSTGRES_PASSWORD: example
      POSTGRES_DB: AspNetIdentitySampleDB

  adminer:
    image: adminer
    restart: always
    ports:
      - 8080:8080
Use the following to fire up the two containers:
docker-compose up -d
The “-d” option runs this command in detached mode. You can verify that the two containers are running using “docker ps”.
Step 4 - Recreate the default migration
The default migration to create the schema doesn’t work with PostgreSQL. Therefore, delete the Migrations folder. Then use the following in Package Manager Console to regenerate migration.
Add-Migration InitialPersistedGrantDbMigration -c ApplicationDbContext -o Data/Migrations
And finally, update the database:
Update-Database
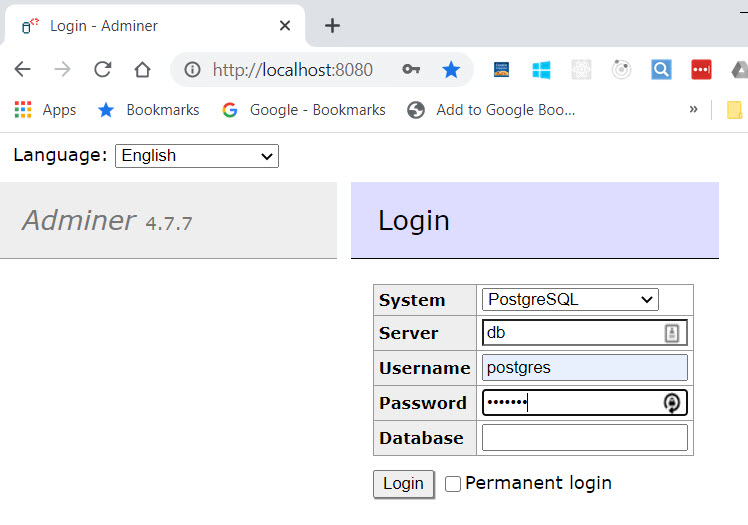
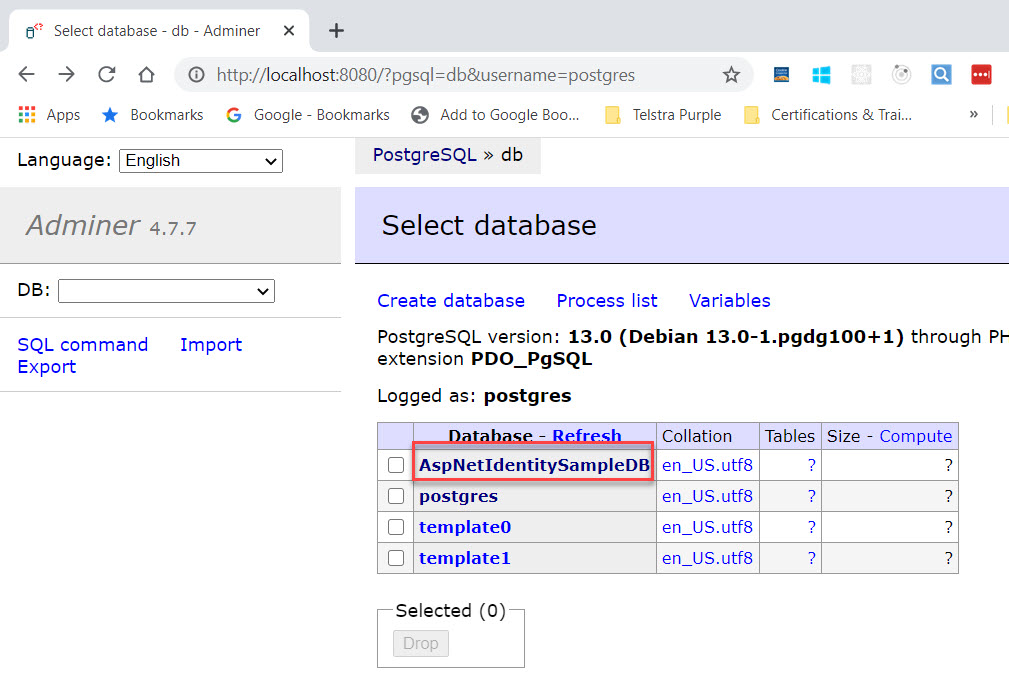
At this point you can see the tables in your new database. You can verify that the schema was successfully created by using Adminer. Fire up your favourite browser and navigate to localhost on port 8080. Log into Adminer (make sure you select PostgreSQL in the “System” dropdown).

You should now be able to see the database with Identity tables.

You can now run the default template as expected.
Conclusion
In this post we setup a ASP.NET Core application using the template provided by Visual Studio 2019 with Identity data stored in a PostgreSQL database running in a container.
The complete sample can be found here.